Heading out the door? Read this article on the new Outside+ app available now on iOS devices for members! Download the app.
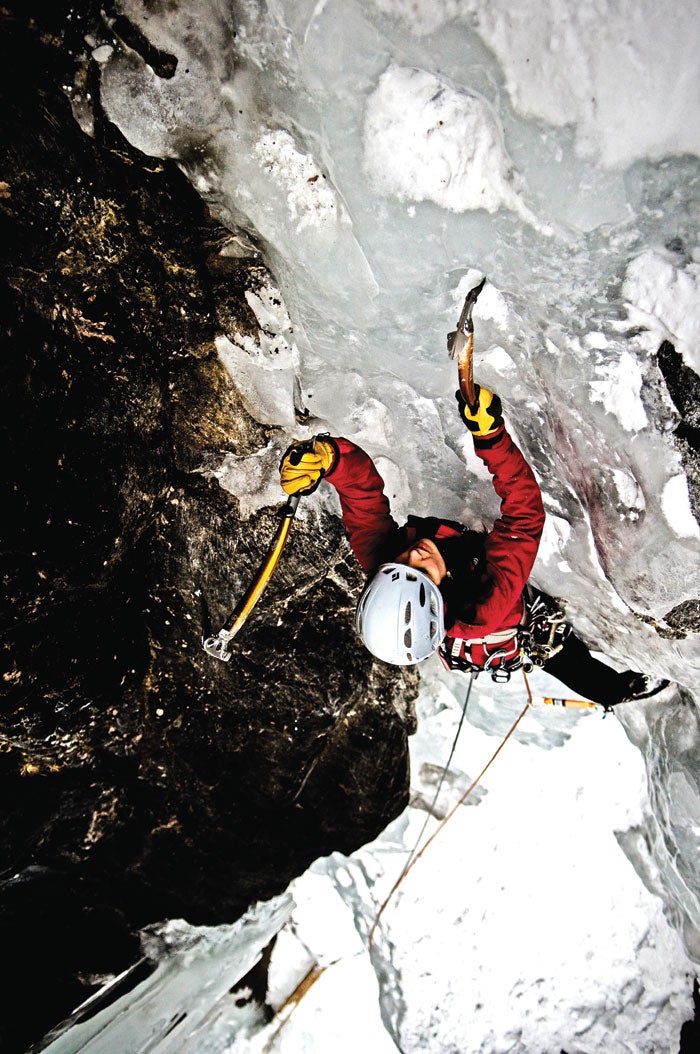
I’ve been climbing ice for more than 30 years, and I still get chills before starting up a column of steep ice. Sure, modern ice tools and crampons, warm gloves, and easy-to-place screws have made ice climbing much easier than it used to be. These days, a new ice climber can follow short sections of near-vertical ice on her first day out. A competent rock climber can lead lower-angle ice climbs halfway through his first season on ice, as long as he gets enough mileage. Yet for many climbers, truly vertical ice—WI4+ and up—remains frightening territory.
But it doesn’t have to be that way. As with any other form of climbing, the keys to confident ice climbing are the right techniques, systematic practice, and a modest amount of training. We asked seven of North America’s most experienced ice climbers to share their hard-won wisdom. Put their tips to work, and we guarantee you’ll be more comfortable—and safer—on steep ice. —Dougald MacDonald



Technique: Squat, Stand, Swing
By Will Gadd

To lead vertical ice safely and efficiently (and not just get up it), you need to have toproped or followed at least 50 pitches of steep ice. There are no shortcuts to this process, no secret workouts or vitamins—just action. Hang a toprope on a steep piece of ice and go at it for five or six big sessions. Practice placing screws, reading the ice, and climbing with and without tools and/or crampons. Soon you’ll be champing at the bit to lead, rather than sketching up the crystal.
Before starting a pitch, study the line to identify stemming grooves, ledges, and other stances to relax. I have yet to meet one waterfall ice climb where I couldn’t get at least five or six totally no-hands rests in 200 feet.
For individual tool and foot placements, always look for concave features or pockets. Anything that looks like the inside of a mixing bowl is relatively good to swing or kick at; anything that looks like the outside of a mixing bowl will break off and shatter. Popular ice pitches often are so picked out with holes that you barely need to swing; practice hooking your tools in other climbers’ placements. Fresh ice will require much more work.
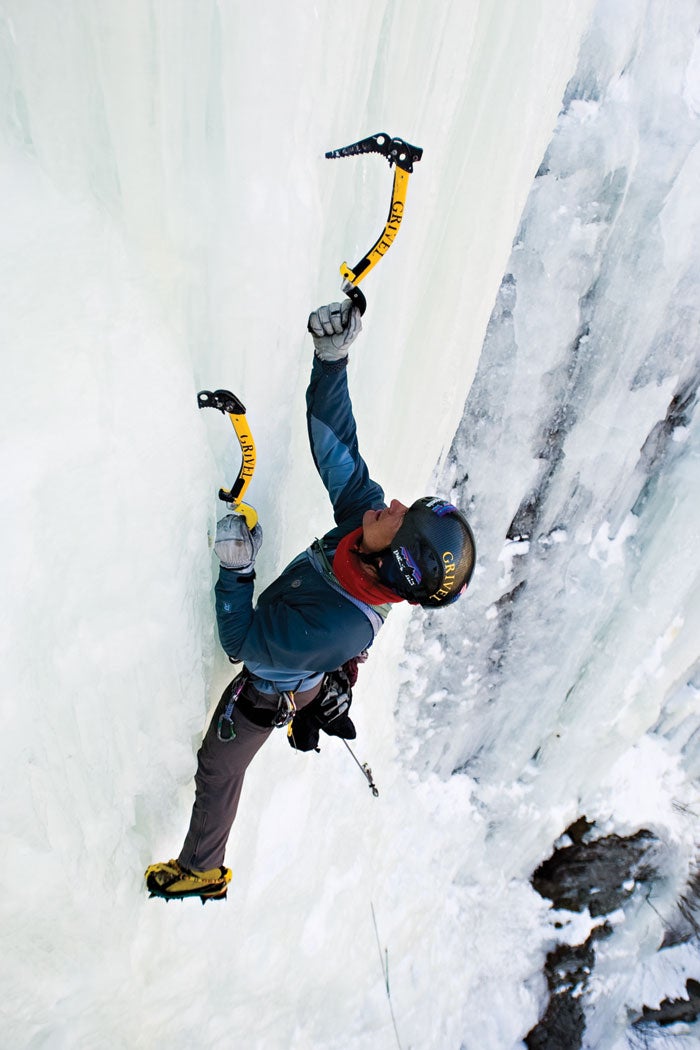
Climbing vertical ice is a repeated sequence of three basic movements: squat, stand, and swing.
1. Squat
With a solid tool placement overhead, keep your upper arm straight as you kick footholds for both feet at the same level. If your feet aren’t at the same horizontal position, the lower crampon may skate off the ice as you stand up. Note that you usually move your feet sideways and then up after each new tool placement—I make about four foot moves for every tool placement. Your knees should end up slightly below your hips. Look carefully for the footholds, taking advantage of any ledges, dishes, or holes in the ice. If your feet are bad, you’ll grip your tools too hard and get pumped. Eyeball your next placement while you’re resting.
TIP: A good practice drill is to follow a steep pitch without crampons. It’s a great way to get you looking at your feet.
2. Stand
Plan where your next tool placement will go: about 12 to 24 inches above your current placement, and roughly shoulder width away. Now stand up toward your upper tool. Almost all of the upward drive will come from your legs, like doing a squat in the gym; your arm only holds you into the wall. As you’re about halfway through standing up, rip upward aggressively on the lower tool like a pump handle. The sharp top of the pick will cut the ice and release the placement easily.
TIP: The primary reason people get stuck tools is placing them side by side. If one tool is lower, it will be easier to rip out of the ice as you stand up.
3. Swing
Keep your elbow near your ear as you swing; this will put the pick into the ice at full arm’s extension. Hook old placements or natural holes, or swing as often as it takes to get a really solid placement. Give the tool a sharp, downward tug; if it holds, it will stay put as long as you keep pulling down on it.
Hang straight-armed from the new placement. You should be in a relaxed position, as if you were standing on a ladder with staggered hands and both feet on the same rung. If you feel off-balance or tense, it’s usually because your upper tool is out to one side or your feet are not level.
TIP: As you swing, watch the pick to make sure the placement is accurate, but then duck your head toward the ice as the pick connects. Inexperienced climbers look to the side; veterans let their helmet deal with the debris.
Now, squat, stand, and swing again— and repeat to the top.
In this sequence, either your legs are bent or your upper (pulling) arm is bent, but never both at the same time. Your natural inclination is to put a good tool into the ice, and then immediately pull up on it, bending your arm. Instead, move your feet and bend your knees while your arm is still straight—then bend your upper arm as you straighten your legs.
Technique plus
-
Ice grades are close to meaningless. A WI6 in beat-out shape can be pretty easy, while a fresh WI4 can require really hard work to clear all the ice.
-
The bulge atop a pillar or vertical wall is often the crux. Place a screw right before surmounting a bulge. Clear any snow off the top, then snap a tool into the ice, flicking your wrist to get a nice arc into your swing. Keeping your upper arm straight and your body away from the ice, move your feet up in small steps, about six inches at a time, until your knees are at or above waist level. Place your other tool beyond the first—not side-by-side—and walk your feet onto the top of the bulge.
-
Get rid of your fat ice climbing gloves— they get wet inside and make your hands colder. Most Canmore ice climbers use light fleece gloves inside a shell, running through three to six pairs of liners in a day.
Training: Get Specific
By Will Gadd
Steep ice climbing requires repetitive and surprisingly consistent movement from the bottom to the top of a route. The ideal training would be to toprope steep ice over and over. But unless you live in Ouray or Canmore, most climbers have to come up with alternatives. Any training should mimic real ice movements as closely as possible. Before I climbed steep ice in Ouray for 24 hours straight last season, my warm-season training consisted primarily of rock climbing combined with thousands of air squat/stands and staggered-grip pull-ups.
1. Squat/stand
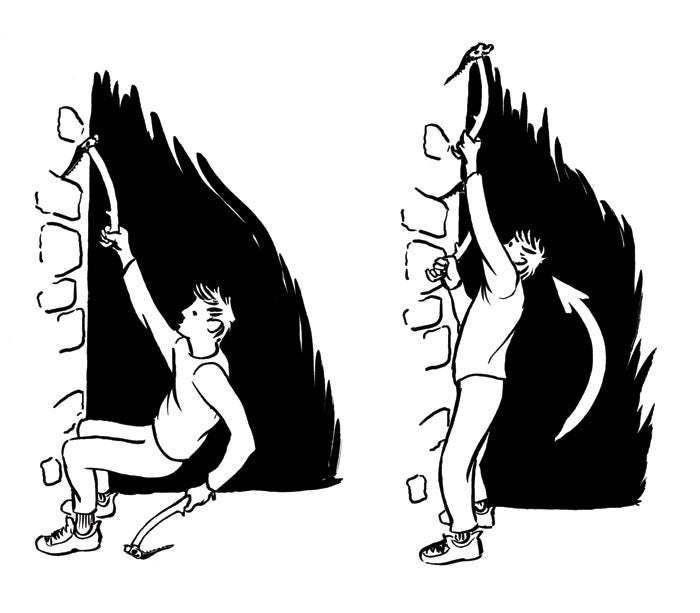
This exercise simulates the basic movement of steep ice climbing. Stand at the base of a stone wall, playground apparatus, a tree with low-hanging branches, or any other place you can hang a tool with the grip at about head height. With your toes against the wall, grasp the tool and drop into a squat so your kneecaps are at hip level. Now quickly stand up and reach high overhead with the other tool or your bare hand, holding the lock for a second or so. (See illustration above.) Drop back down and repeat. Do 25 of these movements with each hand pulling, and you’ve covered most of the movements required to climb a pitch of steep ice.
If a set of 25 reps on one side is too hard, do sets of whatever number works to get to a total of 25. If this exercise feels too easy, you’re not squatting deep enough or going fast enough through the movement. As you get stronger, you can add a backpack with weight to make the exercise harder.
2. Staggered grip pull-ups
If you don’t have a good place for squat/stands with an ice tool, supplement normal “air squats” (squats with no weight) with staggered-grip pull-ups. Hang one ice tool over a pull-up bar and grab the bar directly with your other hand, so your hands are staggered vertically about 12 inches. Start fully dead-hanged, pull up, and hold a good crisp lock-off at the top of each pull-up. For each workout, do about 25 percent of the number of pull-ups as you do squats. If you’re not strong enough to do pull-ups, leave your feet on the ground, but go through the full motion including the lock-off. One day, you’ll be doing pull-ups.
3. Swing a stick
I train for swinging tools by holding the end of a broomstick, umbrella, or household hammer—it doesn’t really matter what implement you use—and swinging it as I would an ice tool. Concentrate on accurately controlling the arc of the swing directly over your shoulder, with your elbow up near your ear. Do enough on one side to get pumped, then the other side, and then repeat until you can only manage half the swinging time of the fi rst effort. Three times a week will be more than enough.
4. Cardio
In training for steep ice climbing, don’t forget one key component: hiking to the climb with a heavy pack. Even if you live in Manhattan, you can walk across the island and find some stairs for laps two or three times a week. Six miles and 2,000 feet with a pack will be about right. If you don’t live in Manhattan, you really have no excuse—so get going!
Non-specific training is great, but it should be secondary to these exercises, and should be done in the off-season. I like to do CrossFit sessions and then make my training increasingly specifi c as ice season looms. In the end, no weight training will make you a decent climber, on ice or rock—you gotta climb. But having plenty of strength is always a good thing!
Training plus
-
To build better grip endurance, do your squat/pull exercises with fat gloves, and hold the shaft of the tool above the grip.
-
It’s easy to build a simple ice-climbing woody and prop it against a tree in the yard.
Placing Pro: Screw or Be Screwed
By Mark Synnott
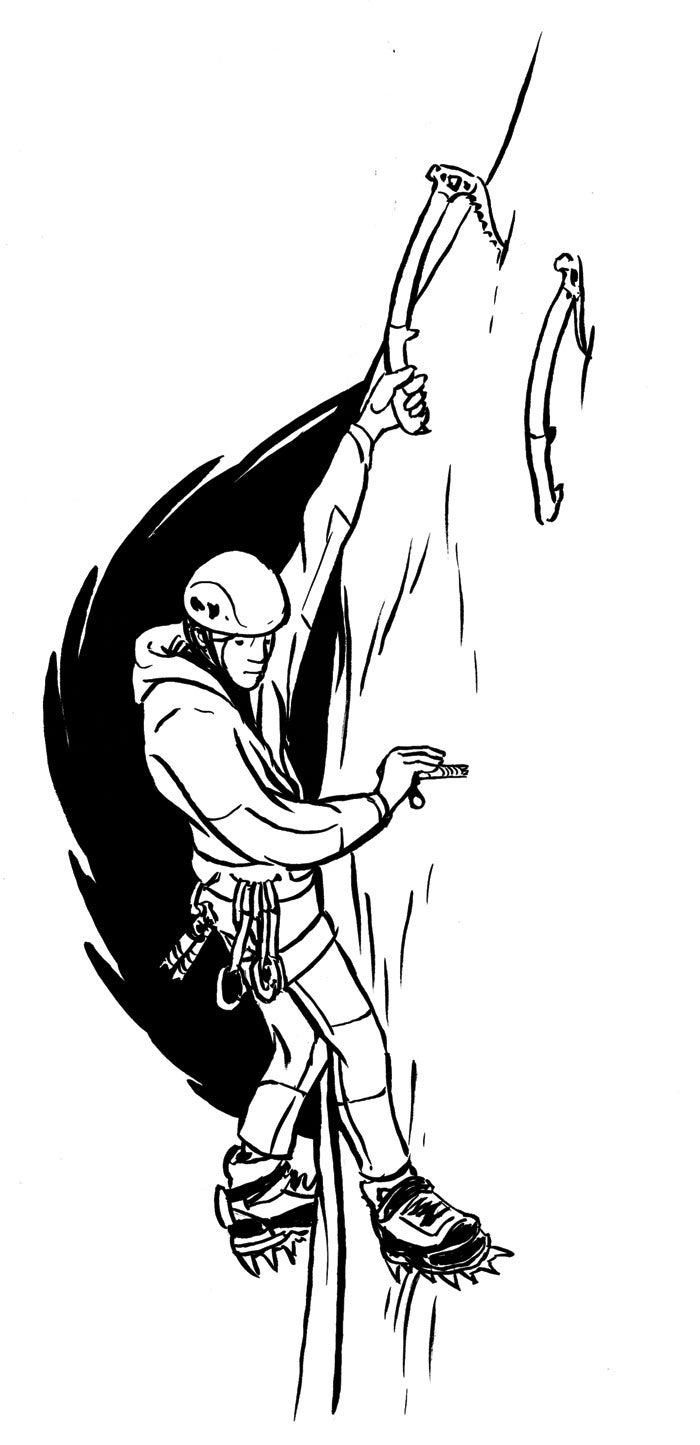
For many ice climbers, placing pro is the crux of any route. Halfway up a vertical pillar, it’s all too easy to find yourself sketching just when you need composure the most. Fortunately, modern screws are so easy to use that there’s no excuse not to place plenty on vertical ice.
Before you set off, visualize how you want the climb to look when you’re done. Ask yourself: where am I going to place my first screw, second, third, and so on? How many of each length screw will I need? Can I get any rock pro? Depending on the specific circumstances, space screw placements from every body length to every couple of body lengths. Bottom line: could you fall off without hitting the deck or a ledge?
Once you have a game plan, rack up accordingly. “Screw rackers” on your harness, such as the Petzl Caritool or Black Diamond Ice Clipper, are essential for easy one-handed access to screws. It’s nice to have two rackers on your strong side (right side for righthanders): one for stubbies and one for your go-to 17cms. Put the 22cm screws for the anchor and V-threads in back.
For a full rope length of steep ice, you could need as many as 16 screws, so you’ll also need a racker on your weak side to distribute the load. Grab screws from the weak side whenever you have easy placements.
It’s normal to lead up a few body lengths before your first screw.
When you’re ready:
-
Hang straight-armed off a secure tool placement. If you’re right-handed, try to choose a stance with a good left tool placement overhead.
-
Position your feet in secure placements directly underneath your shoulders. If at all possible, find a flat-footed placement for the foot opposite the arm you’re hanging from—this will make your stance more restful. Look for ice blobs that can be quickly hacked out with your front points to make a small shelf. Seize any opportunity to stem and get your weight off your arms. Settle in completely on your feet, and grip your tool only as hard as needed to stay in balance.
-
Place your other tool out of the way, but where you can grab it easily for a rest.
-
The sweet spot for placing a screw is in a zone from your waist up to about your nipples, and no more than about a foot to the side. This is where it’s easiest to get leverage for pushing the screw into the ice. If you place too high, you’ll be out of balance, and you’ll find it more difficult to get the screw started and pumpier to turn it into the ice.
-
As you start to twist in the screw, push inward on the head. In solid ice, the tip of the screw should angle slightly upward as it penetrates the ice. If you start the placement perpendicular to the surface, the head will likely drop a bit as the screw goes in—perfect.
-
Once the threads are biting, crank in the screw. If necessary, use your free tool to break away any ice that prevents the screw from going in all the way. The hanger should end up flush against the ice surface.
-
If your upper arm gets pumped, grab your other tool and let go with the pumped arm. Flex your fingers in and out, or shake out like you do while rock climbing.
-
Once the screw is buried, clip a draw to it with the gate on the bottom biner facing away from you. Pull up the rope, and push the biner against the weighted rope with your thumb—this is the easiest clip to make with gloves on.
Before your first steep lead—and at the start of each season—throw a toprope on a steep pillar and do a mock lead, placing all of your screws along the way. This will help you dial in your systems, fi nd the most restful stances, and make sure you have the stamina to get the job done when you actually go for it.
Protection plus
-
When you’re starting out leading steep ice, it’s a good idea to girth-hitch a short tether to your harness with a slim carabiner or fifi hook at the free end. As a worst-case scenario, you can clip this into the carabiner hole in the spike of a bomber tool. Just knowing you have it there, just in case, can be a big confidence booster. Remember that this umbilical is only as good as the tool it is clipped to.
-
If you’re climbing with leashes, make sure you have a well-dialed system for getting in and out, or use (and practice with) removable leashes.
-
Many ice climbers carry load-absorbing quickdraws such as Screamers, but keep in mind that a rack of 15 Screamers is up to 2.5 pounds heavier than the same number of lightweight draws. The lighter your rack, the easier the climbing will be. Carry a few Screamers for sketchier screw placements, and always for the first placement above a belay, in order to minimize the risk of a severe fall onto the anchor.
Screw sharpening
Protect your screws’ sharp, delicate teeth and threads by using plastic screw caps and carrying screws to climbs in a sturdy bag. Sharpen bent or worn teeth on screws with a small file, carefully mimicking the shape of teeth on new screws.
Ice FAQ

Q. I like leashless climbing because it makes placing gear and shaking out so much easier. But I get too pumped. Do you recommend leashes for really steep ice?
A. At the beginning of the ice season, when fitness and confidence are not quite there, climbing with leashes may be safer. Otherwise, sans dragonnes is the way to go. After placing a tool, relax your grip and allow your hand to “cradle” the handle. Wiggle your fingers a little before making the next move. —Jack Roberts
A. To understand how little you really need to grip, have someone pull hard on the head of the tool while you grab onto the handle. Gradually loosen your grip as your friend pulls. You’ll soon realize that you hardly need to hold the tool for it to stay in your hand. —Caroline George
Q. If I get gripped on a steep column, should I downclimb to the last piece, or is there a way to protect myself while I get in a screw?
A. First thing to do is look for a stem or other rest, and see if you can get a screw in where you are. There are many other ways to get weight off your arms, but they’re all acts of desperation. Ratchet back your climbing goals until you truly posses adequate fitness and technique—and a good lead head—to tackle steep columns. —Steve House
A. Try rigging a fifi hook on a body-weight-bearing bungee cord that is about eight inches shorter than your maximum reach and is tied into your harness. Practice hooking into tools with this system close to the ground—there is a change of angle in the pull when you weight your harness. —Barry Blanchard
A. I have seen all sorts of gimmicks for this situation. Clip a draw to one of your tools and clip in the rope? Maybe, but kinda sketchy in my opinion. Use an ice hook for temporary pro? Yikes! If it takes you longer than a minute to get a screw in, keep practicing. —Clint Cook
A. First thing to do is look for a stem, a rest of some kind, and see if you can get a screw in where you are. There are many other ways to get weight off your arms, but they’re all acts of desperation. Ratchet back your climbing goals until you feel you truly posses adequate fitness and technique and a good lead-head to tackle steep columns. —Steve House
Q. My feet often sketch out on vertical columns, especially if the ice is chandeliered. Is something wrong with my crampons?
A. Doubtful that it is the tools—rather the carpenter. Don’t lever up on your front points as you reach. Play with turning one of your knees outward on ice near the ground, so you can learn to rest that foot on the inner second point. —Barry Blanchard
A. Often, when terrain gets steep, climbers won’t hang their ass out far enough to produce a good motion for placing crampons. Get your butt back farther to kick, and keep your heel cocked down. —Clint Cook
A. You might be lifting your heels, and it’s also possible that you have too little front point, due to your particular boot/crampon combo. Shorter front points are preferred for classic (read: vertical or less) mixed climbing, because the lever arm is shorter. Longer front points make it easier to maintain positive contact with vertical ice. —Steve House
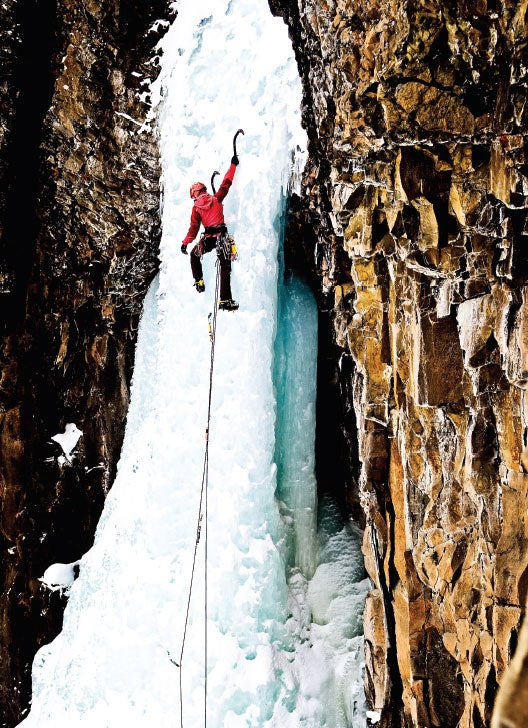
A. Planting your crampon points securely on vertical, chandeliered ice requires flexibility in the ankles so that you can make use of all those crampon points. Frequently change your foot placement, and don’t be afraid to experiment with foot positions like toe or heel hooks. It’s all about contact! —Jack Roberts
Q. I’ve always wondered what would happen if I dropped a tool or broke a pick while leading steep ice. Do you carry a third tool for this reason?
A. Carrying a third tool seems sketchy to me. If I were to take a tumbling leader fall, I wouldn’t want that extra dagger strapped to my waist. —Steve House
A. If I’m on a very long route where I know there is going to be hard black ice, I take an extra pick. Yet, I have never broken a pick in my life, not even torquing it in a crack. The only time I dropped a tool was rapping off Ames Ice Hose, and that’s how I met my husband, so it turned out to be a good thing. On longer routes, I will use bungee cords to attach the tools to myself, to make sure I won’t lose one. —Caroline George
Q. Do picks come from the factory ready to go for steep ice these days? Or should I modify them somehow?
A. Some manufacturers’ picks still come with larger than necessary surface area along the top edge of the pick. If you remove some of this with a file, creating a sharper edge on top, the pick will penetrate the ice better, feel stickier, and be easier to remove. —Jack Roberts
Q. I have friends who tell me I should always use locking carabiners on both ends of quickdraws clipped to ice screws, because the screw side might open against the hanger and the rope side is susceptible to vibration. Is this bogus?
A. Only do this if you really hate your follower. If you are conscious of direction of movement, gate direction, and rope orientation, those concerns are easily mitigated. I rig my draws with biners facing the same direction, and find it helps to clip everything correctly. —Clint Cook
A. Bogus! Use wiregate carabiners when ice climbing. They are free from the “flutter factor” associated with spring-gate biners, and they won’t freeze up. When placing a screw, be certain the ice around the hanger has been cleared sufficiently so the carabiner gate is not accidentally wedged open when it’s clipped into the hanger. —Jack Roberts
Q. In the old days, it seemed like everyone led with double ropes out of fear of chopping a rope. Now it seems like lots of good climbers lead with single ropes. Is that safe?
A. I think a big reason for this change is that V-threads have made it easier to do multiple rappels. Earlier, with fewer anchor options, minimizing the number of raps was key. Also, older ropes didn’t have very good dry coatings, and not all that long ago a 10.5mm was a skinny single. With a wet, iced-up 10.5mm, you couldn’t rappel or belay. Skinny double ropes were easier to handle if they did get iced up. —Steve House
A. I lead on a single rope and pull a tag line for rappels. There is less rope drag, it’s simpler to clip just one rope, and if you do swing into it, there is less chance of the thicker rope getting damaged. To avoid chopping the cord, make sure you have awareness of where it is at all times. If you do swing into it or step on it, take a thorough look at the rope, and if you can’t see any damage, you are good to go! —Caroline George
Q. What do you think of “rollies” for training? You know, using a broomstick to roll up a weight attached to a cord?
A. Any training is better than no training, but specificity rules. Rollies are good for getting good at rollies, but not for the specific musculature of swinging an ice tool. —Will Gadd
Practice Zones
Frankenstein Cliff, Crawford Notch, New Hampshire
If you’re looking to break into leading steep ice, you’d be hard-pressed to find a better area. The approach is only 10 to 20 minutes, and there’s a dense concentration of routes in the WI4/5 range.
-
Routes: Smear (NEI4), Pegasus (NEI4), Hobbit Couloir (NEI4+), Chia (NEI4), and Cave Route (NEI4), all in the Amphitheater area. For toproping in the Amphitheater, try the right side of Chia (two ropes needed to belay on the ground) or Cave Route (climb NEI3 ice on the left to tree ledge and toprope steeper right side). Dracula (NEI4+) has two 120-foot lines, both with stemming to keep the pump reasonable. All these routes are very popular, so don’t hog a climb.
-
Guide’s Tip: The vertical sections on many of these climbs rise above big ledges, so place lots of screws and have a very attentive belayer.
-
Nearby Options: Lake Willoughby, VT (the Tablets area); Rumney, NH
—Mark Synnott
Haffner Creek, Canmore, Alberta
Haffner Creek and nearby Marble Canyon share the same parking lot, and are the perfect places to run lots of laps.
-
Routes: The 50-plus ice and mixed routes in Haffner tend to be short (60 feet) but full-value climbing, especially the mixed rigs. Marble doesn’t have as many routes, but they come in early (November) and stay until about April, and they’re longer, at about 100 feet.
-
Guide’s Tip: When it’s too cold to climb elsewhere, you’ll often find many of Canmore’s most devoted ice climbers in Haffner, equipped with down pants and a stove. You can climb down to –30° if you run quick laps.
-
Nearby Options: Johnston Canyon, Grotto Canyon
—Will Gadd
Ouray Ice Park, Ouray, Colorado

The Ouray Ice Park is far and away the best place in the world to learn how to climb waterfall ice. With close to 200 routes of all difficulties within 15 minutes of the car, climbers can focus all their time and energy on climbing. Ninety-five percent of the routes are equipped for toproping. Check out our Ouray, Colorado destination guide for more tips on planning the perfect trip.
-
Routes: If you are a new leader, the New Funtier area is excellent for honing your skills. Remember: This is a park designed for fun and education. Leaders have no priority over topropers. Be cool and positive.
-
Guide’s Tip: Bring an extra-long cordelette (30 feet) or static rigging rope to extend your anchor to the lip of the gorge.
-
Nearby Options: Skylight Area, Ames Falls (Telluride)
—Clint Cook