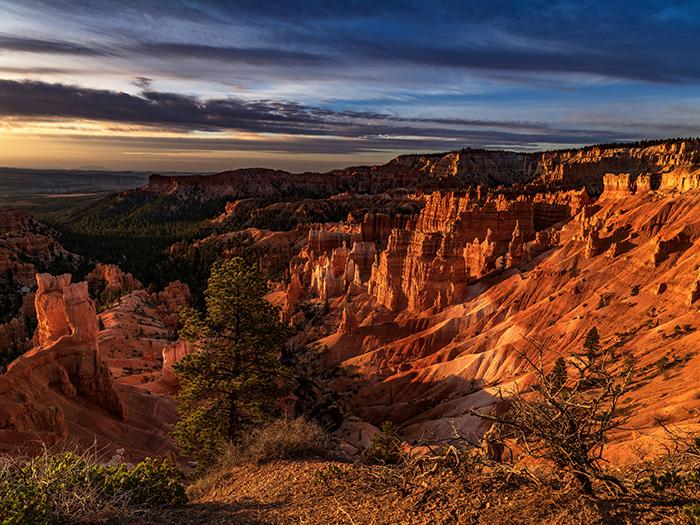
A saturated sunrise along the Rim Trail looking toward Sunset Point, Bryce Canyon National Park / Rebecca Latson
Following on the heels of the Canyonlands National Park Armchair Photography Guide, I thought I’d keep things in Utah and pen a guide for Bryce Canyon National Park. Like the previous month’s article, this photo guide provides tips, techniques, and a general overview of the photo ops available to you within this geologically astounding national park, without the necessity of venturing far from car, camper, cabin, or tent while using any camera (SLR, point-and-shoot, smartphone).
As a matter of fact, I used my SLR, point-and-shoot, and smartphone to get shots for Parts 1-3 of this guide. The trails in this national park are well-maintained and easy to hike, although the descents and ascents are a little on the steep side, and it's very dry here, no matter what season. That said, if I -- an out-of-shape, overweight photographer with rheumatoid arthritis who lugs around a heavy, gear-filled backpack -- can hike these trails, then I’m pretty certain you can, too. Just take your time, bring plenty of water, wear sturdy hiking shoes or boots, watch your step, and enjoy the journey with your camera.
Because there are so many photo opportunities within Bryce Canyon, I've divided this Armchair Photography Guide into three parts. Part 1 covers the area from Sunrise Point to Sunset Point along the Rim Trail, including a side trip from Sunrise Point onto Queens Garden Trail with a connection to the Navajo Loop Trail.
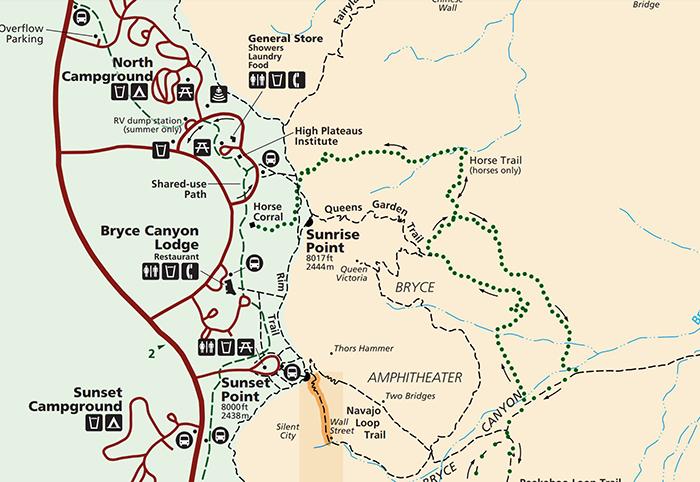
A map of Sunrise Point to Sunset Point, Bryce Canyon National Park / NPS
The Park
For a map view of this entire national park, click this link. The “canyon” part of Bryce Canyon National Park might be a little misleading. This place is not a canyon in the sense of Grand Canyon National Park or Black Canyon of the Gunnison National Park. Bryce Canyon is actually a series of scalloped amphitheaters within which stand some of the most unusual geologic formations you’ll find anywhere in the United States. Within these amphitheaters, you’ll see crumbly rock walls eroded (and eroding) into fins, windows, spires, and hoodoos. Their colors are saturated shades ranging from beige to salmon-pink to orange to yellow. Sunrise and sunset further gild these formations with brilliant golds and oranges. This entire national park is one big geology lesson.
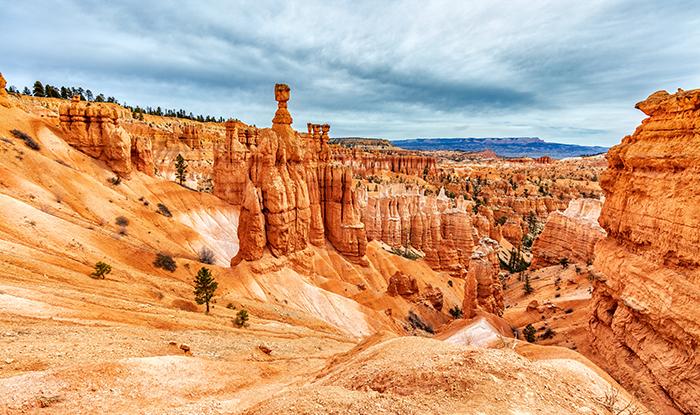
Sunset Point scenery, Bryce Canyon National Park / Rebecca Latson
Getting There
Not including any side trips, it takes about four hours from Las Vegas or Salt Lake City, and almost five hours from Grand Junction, Colorado. Regardless of which route you take, the scenery along the way is exceptional, so enjoy the journey.
Services
The closest town is Bryce Canyon City. I call it "The Town That Ruby Built," since it really is a company town built up by one Reuben C. (Ruby) Syrett. The Traveler published an article about Ruby’s Inn a few years back. Ever heard of the place? Five minutes north of the national park entrance, this town offers food, lodging, entertainment, and vehicle servicing, as well as a post office. The shuttle into the park begins and ends here, as well.
Camera Gear
The advice for gear in this guide is the same as in my previous Armchair Photography Guide for Canyonlands National Park. Whatever camera you use, I suggest you bring the following:
- At least one spare charged battery and battery charger (or an outlet charger and a car charger for your smartphone)
- Plenty of memory cards for point-and-shoot or SLR cameras ranging from 16GB to 128GB
- Laptop (or some device onto which you can download and save images from your memory card)
- Portable hard drive(s)
- Memory card reader
For SLR cameras, you’ll want to pack:
- At least one wide-angle lens and a telephoto lens; zooms are the most versatile, especially if you are short on space. If you have room for a prime lens, bring that, too
- Circular polarizer filter (CPL)
- Graduated neutral density filter (grad ND)
- Tripod
- Wireless shutter remote
Regarding the telephoto lens, you’ll see birds aplenty and probably other wildlife like squirrels, chipmunks, and mule deer, but you should have a telephoto handy for what I call “telephoto landscapes.” These close-up images of the landscape give your viewers a better sense of this national park and its formations. The wide-angle lenses I always bring along are my 14mm, 16-35mm, and 24-70mm zooms. The telephoto I bring is my 100-400mm, but a 70-200mm or even a 24-105mm lens will produce great close-ups, too. Point-and-shoot cameras have built-in telephotos. Smartphones can zoom in closer, as well, but the images aren't always quite as crisp.
A CPL filter is something every SLR photographer should have in their gearbag. CPLs work on the same principal as your sunglasses, so when your lens is at a right angle (give or take) to the sun, this filter reduces glare, eliminates reflections, saturates color, and adds texture to clouds and craggy canyon rock. Simply rotate the outer ring on the filter to see what I mean.
Grad ND filters, another important SLR photo accessory, are round, square, or rectangular half-clear, half-shaded pieces of glass or high-quality resin. The shaded portion comes in different densities of gray and is used to correct for overexposure of the highlights to a bright sky while you expose for the darker portion of your landscape.
It goes without saying that you should bring a tripod. You can even find a tripod mount for your smartphone. Tripods really do stabilize your camera for clear, sharp images. Yes, image stabilization (IS, VR) is very handy and I've handheld my camera many times, relying upon that stabilization feature. There are photography techniques, however, which are difficult to achieve when you are holding a camera rather than placing it on a tripod.
Speaking of image stabilization, you should turn that feature off while your camera sits on a tripod. If your stabilization feature is left on, believe it or not, your resulting photo will look a little blurred - not much, but enough that you can notice it when reviewing the shot up close. You see, when IS/VR detects no camera shake, it actually creates its own movement and thus "shakes" your image up a little. So, the gist of this paragraph is that I highly advise you bring a tripod with you. Also, if you need a little support along the trails’ ups and downs, your tripod will serve double-duty as a hiking staff. Seriously.
A wireless shutter remote is optional. I use it for my own selfies (grin), but it's also handy for clicking that shutter button and preventing the ever-so-slight camera shake caused by your finger on the button. You can leave the wireless release at home, if you wish, and just use your camera's 2-second timer delay to eliminate camera shake. Of course, the wireless remote and 2-second timer are predicated by your use of a tripod.
Accessing the View Areas
Bryce Canyon National Park has plenty of signs pointing you in the direction you wish to go. Accessed by short side roads off of the main road, all of the view areas have parking. However, depending upon the time of day you arrive, the availability of spaces may be slim to none. If you are camping or staying at the lodge within the park, you’re just a short hike away from the park’s main Rim Trail. You can also bike or hike along the shared-use trail that opened up in 2016 and extends 6.2 miles into the park.
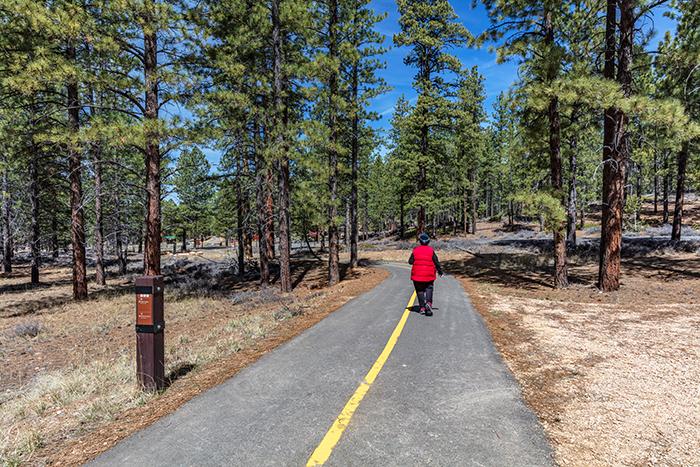
Taking a walk along the shared-use trail, Bryce Canyon National Park / Rebecca Latson
Sunrise Point
From this view area’s name, you know the sunrises will be awesome, but you can also achieve stunning images any time of the day – even midday. Sunrise Point is fantastic for photographing not only the actual sunrise as that brilliant orb climbs up over the horizon, but also for capturing the sun's fiery glow of orange and yellow bathing the hoodoos, fins, and spires within Bryce Amphitheater. Turn your lens toward the formations instead of the actual sunrise, and a CPL will saturate all of that delicious color. A wide-angle lens (14-24mm) encompasses a large swath of the amphitheater. Make sure one of your images includes the tree with the funky exposed roots right next to the fence. Also, use your telephoto lens to zoom in on and isolate a particular interesting formation or group of formations.
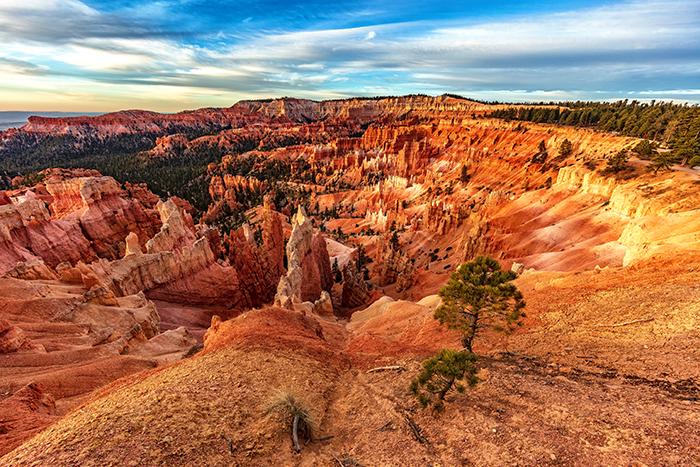
Sunrise colors at Sunrise Point, Bryce Canyon National Park / Rebecca Latson
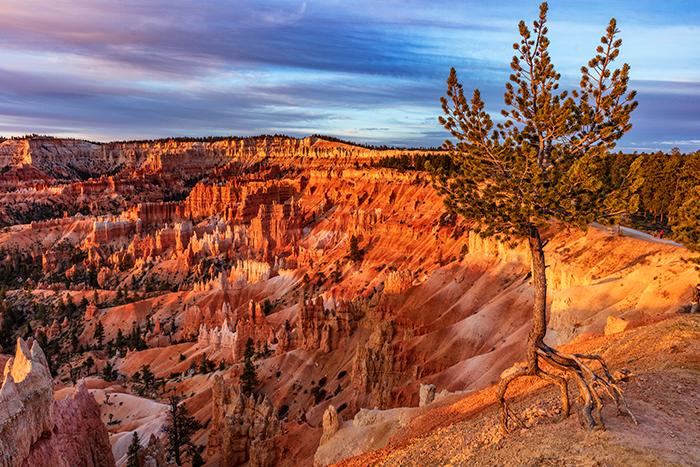
Keeping a toe-hold on life, Bryce Canyon National Park / Rebecca Latson
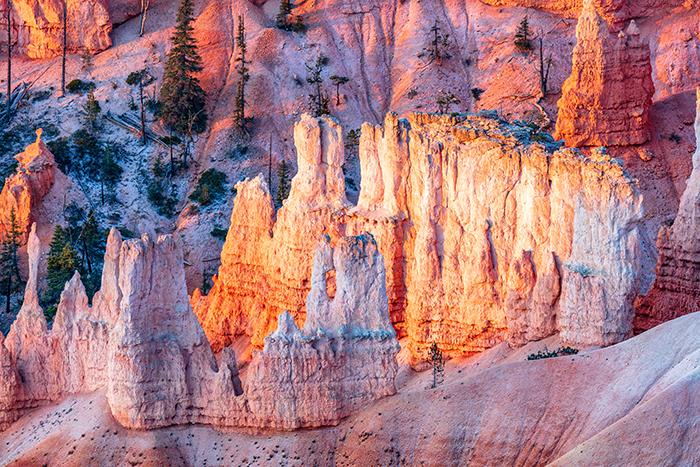
A telephoto of sunrise colors from Sunrise Point, Bryce Canyon National Park / Rebecca Latson
To photograph the actual sunrise itself, use a lens hood to reduce flare spots and/or a grad ND filter so you can expose for the scenery below the horizon and not blow out (overexpose) the highlights of sky and sun. A round grad ND will allow the lens hood to remain affixed to your lens, but a rectangular grad ND, which is what I use, makes a lens hood problematic since the hood won’t fit over the filter. It's a toss-up as to what you wish to use when capturing the sunrise. For the image below, I used only the grad ND. As the sun first peeked up from behind the horizon line, I didn't have any issues with flare. However, as the sun climbed higher into the sky, my images experienced flare spots and lines. Some flare is easy to remove with your photo editing software, but larger and more numerous flare spots are tedious to try and remove. On the bright side, I didn't blow out the highlights of my sky in my sunrise images.
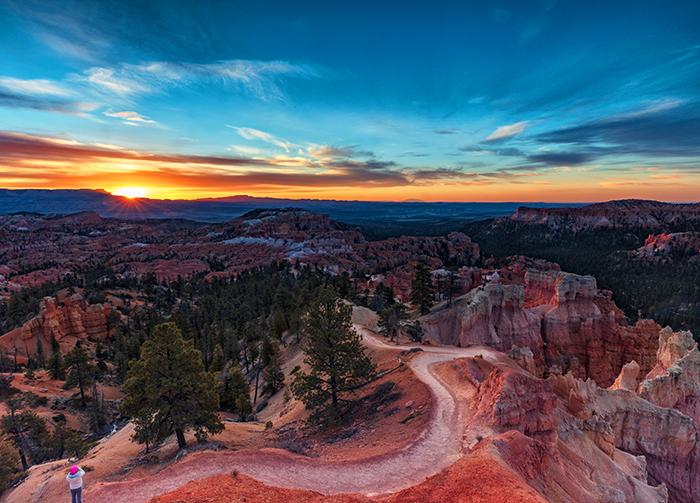
Watching the sunrise at Sunrise Point above the Queens Garden Trail, Bryce Canyon National Park / Rebecca Latson
For sunrise photography, arrive at least 30-40 minutes pre-sunrise because that place gets crowded. You'll need a flashlight or headlamp since it's pitch-black dark! I prefer a headlamp because it leaves my hands free. After the sun has risen, the space will clear out quickly as people start their hikes or go get breakfast. You, however, should definitely stay a little longer to capture a telephoto view of the morning sun’s glow on distant cliff faces before starting your hiking excursion down the Queen’s Garden Trail.
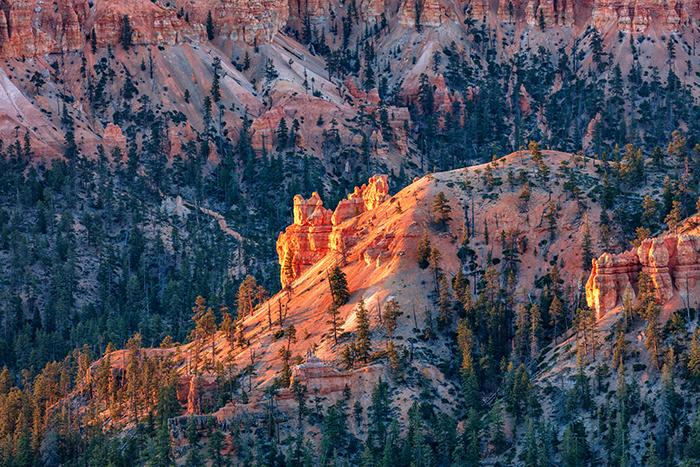
A telephoto view of sunlight on a distant cliff face, Bryce Canyon National Park / Rebecca Latson
Queens Garden Trail
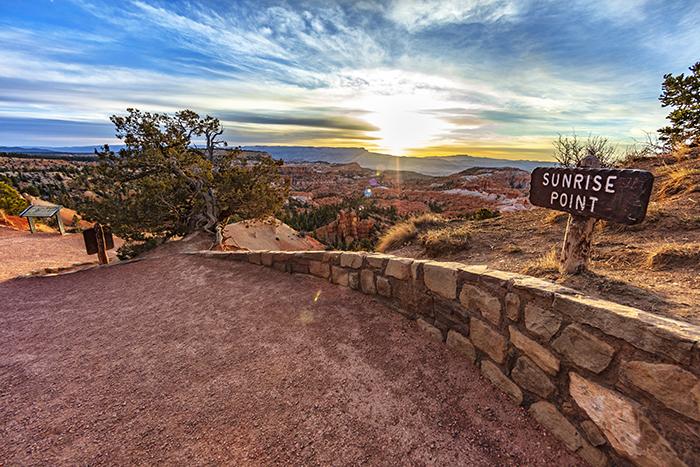
Heading toward the Queens Garden Trail from Sunrise Point, Bryce Canyon National Park / Rebecca Latson
The trailhead begins next to Sunrise Point, so after your sunrise session, start down this 0.8-mile, well-maintained path. You can hike down then back up or continue further to the canyon floor to enjoy views from the bottom before connecting to Navajo Loop Trail up to Sunset Point. Prepare to spend several hours; the photo ops are numerous and you should take your time hiking down then back up to the canyon rim. Bring plenty of water with you.
During your hike, photograph the trail itself for some nice scenery and leading line images. Use the formations as natural frames centered around your photo’s subject. Occasionally, look up to the fenced view area for shots to show how far down you’ve hiked. Look along the trail for other points of interest, like solitary trees surrounded by colorful backgrounds or tenaciously growing out of the bright orange-pink soil slopes. Photograph the tiny figures of people along the trail for a nice comparison of human size vs. park size.
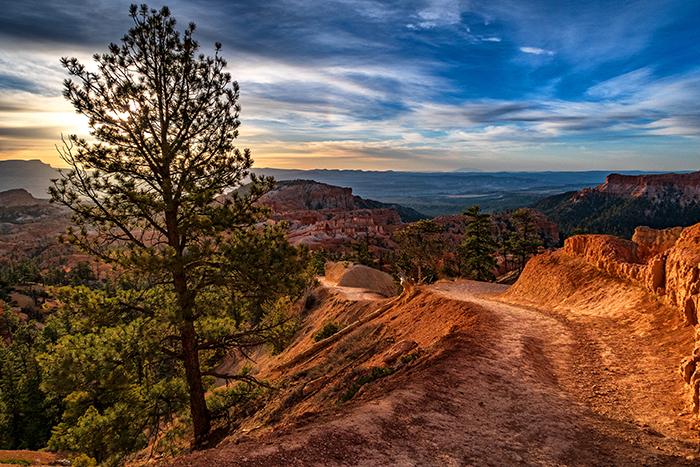
Morning light on the Queens Garden Trail, Bryce Canyon National Park / Rebecca Latson
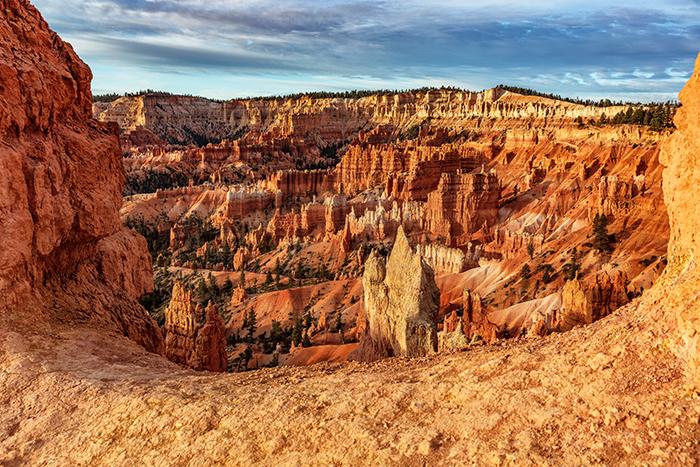
A rock wall frame to the scenery beyond, Bryce Canyon National Park / Rebecca Latson
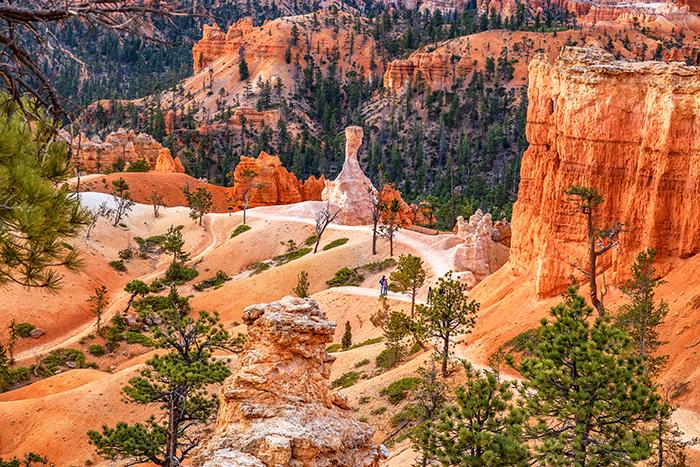
Hikers on the Queens Garden Trail below, Bryce Canyon National Park / Rebecca Latson
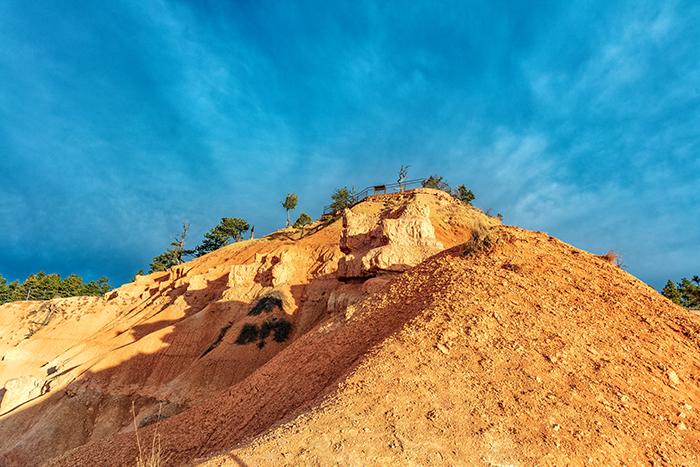
Looking up at the Sunrise Point view area from along the Queens Garden Trail, Bryce Canyon National Park / Rebecca Latson
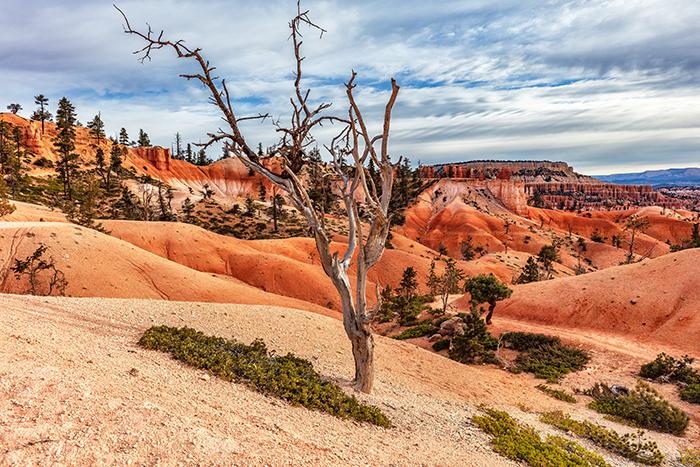
Scenery along the Queens Garden Trail, Bryce Canyon National Park / Rebecca Latson
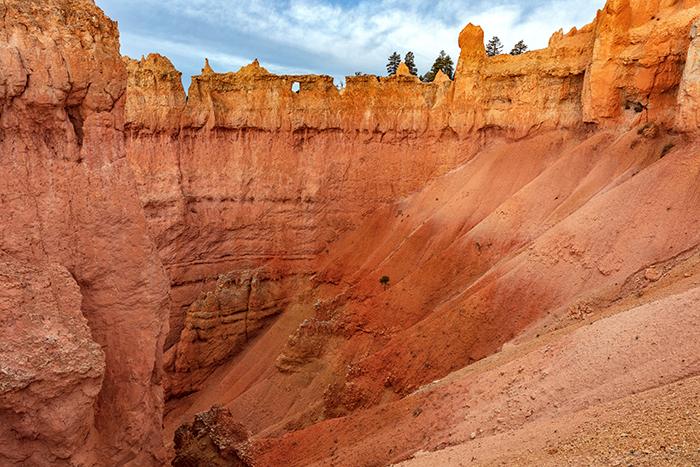
One little tree in some colorful slope scenery, Bryce Canyon National Park / Rebecca Latson
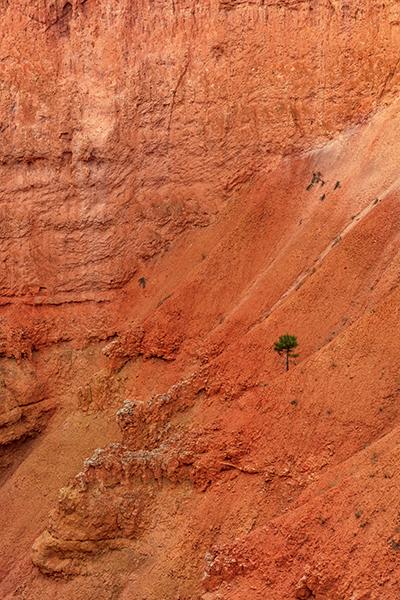
A tenacious little tree, Bryce Canyon National Park / Rebecca Latson
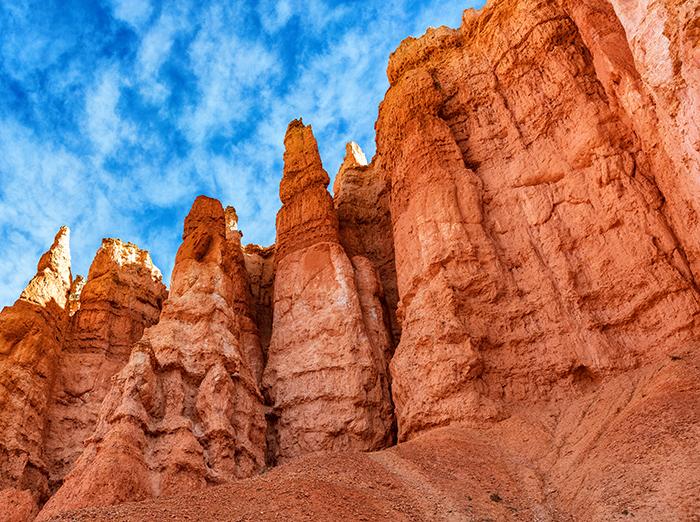
Reaching for the sky along the Queens Garden trail, Bryce Canyon National Park / Rebecca Latson
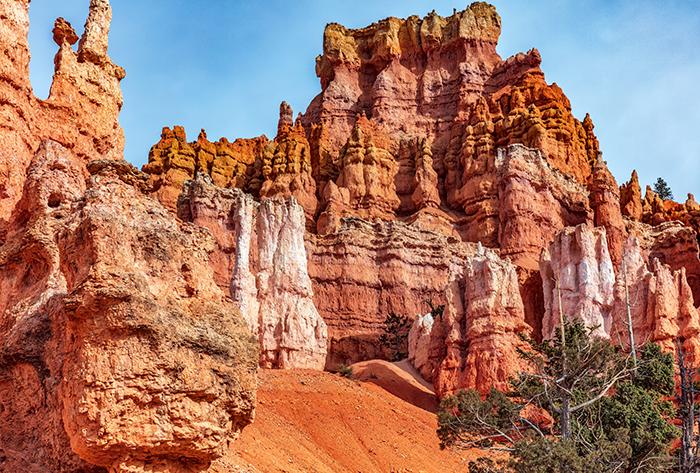
A "garden" full of hoodoos and spires, Bryce Canyon National Park / Rebecca Latson
Once you reach the canyon floor, look around you. Inspect the tree bark texture, color, and sinuous twisting of the trunks. Be on the lookout for wildlife like the Uintah chipmunk and golden-mantled ground squirrel. Maybe even include a couple of hikers in your shot to reflect the scale of sights along the trail at the bottom.
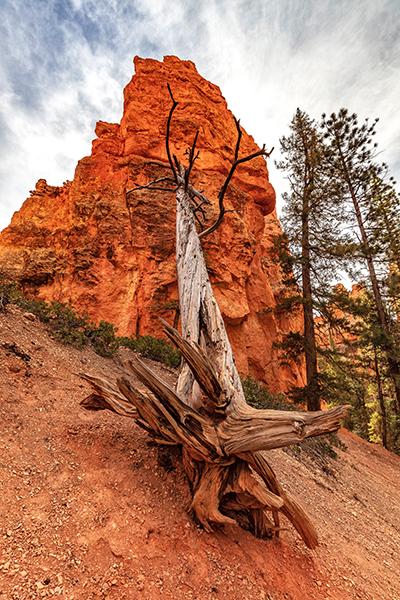
Timberrrrrr! Bryce Canyon National Park / Rebecca Latson
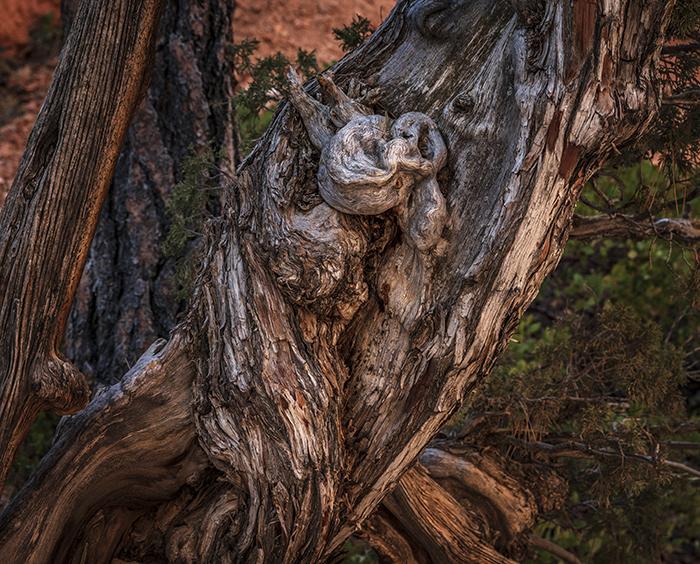
A natural wood sculpture, Bryce Canyon National Park / Rebecca Latson
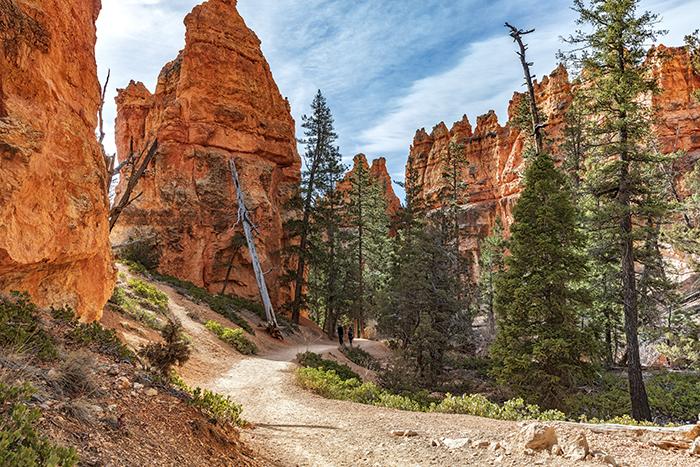
Taking a walk in the park, Bryce Canyon National Park / Rebecca Latson
A note on the wildlife: In addition to the wildlife at the bottom of the amphitheater, explore the forest interior bordering the Rim Trail, where you'll spot Western bluebirds and more chipmunks and squirrels. Along the Rim Trail itself, look for Stellar’s jays and ravens. You might also see mule deer in groups within the forest or alone on the trail. Just remember, it’s all wildlife, so don’t get as close to it as I saw a young lady along the trail do with a chipmunk in an effort to get a furry headshot with her smartphone; she was no more than 12 inches away from the critter before both her boyfriend and I warned her to be careful (I believe his words were “Don’t push it.”). Even little bitty cute creatures like chipmunks can bite.
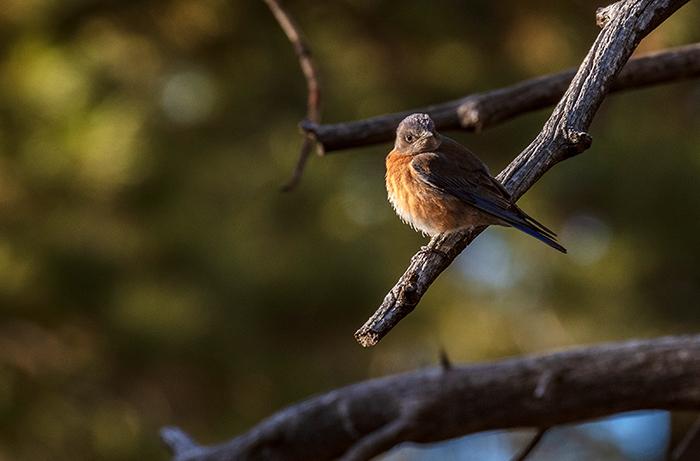
Hey! Who you lookin' at? Bryce Canyon National Park / Rebecca Latson
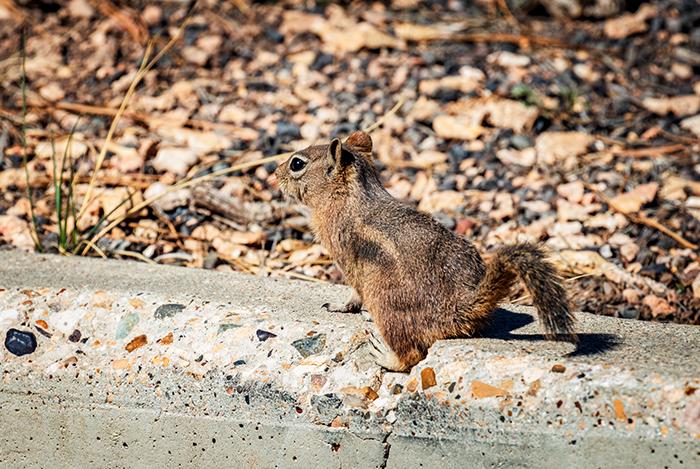
Hello, little fella, Bryce Canyon National Park / Rebecca Latson
The trail you are hiking eventually connects to the Navajo Loop Trail. For this guide, that portion of Navajo Loop Trail directly up to the Sunrise Point view area was the one chosen. Make sure to capture what you see on the way up, including the texture in tree bark and the processes of erosion you might notice from the trail. While you occasionally stop to catch your breath, look down and photograph the hikers maneuvering those switchbacks.
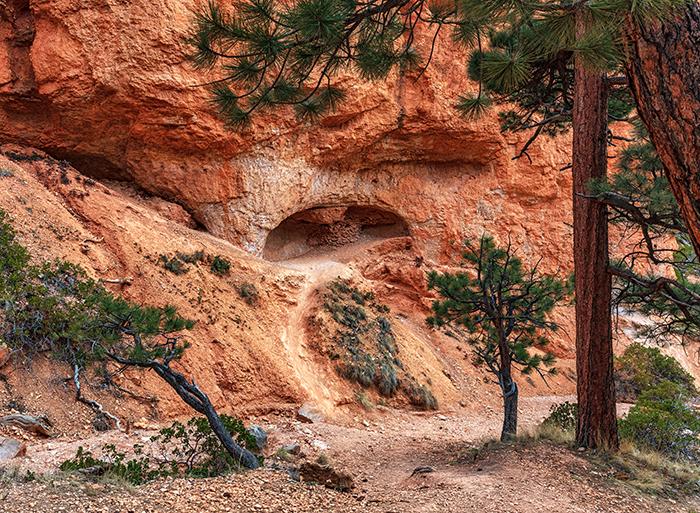
The process of erosion and an arch in the making, Bryce Canyon National Park / Rebecca Latson
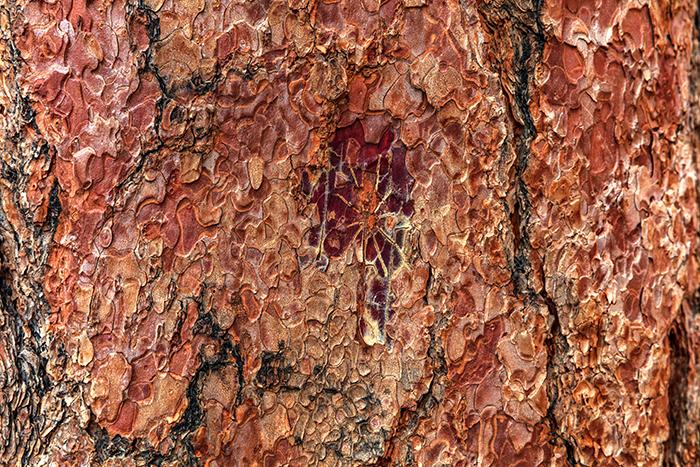
Tree bark art, Bryce Canyon National Park / Rebecca Latson
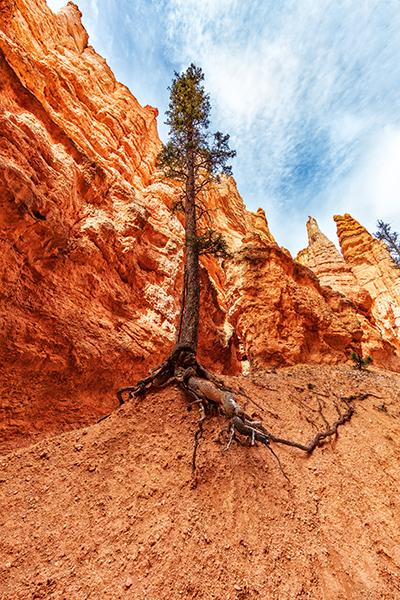
Holding on to the trail by the roots, Bryce Canyon National Park / Rebecca Latson
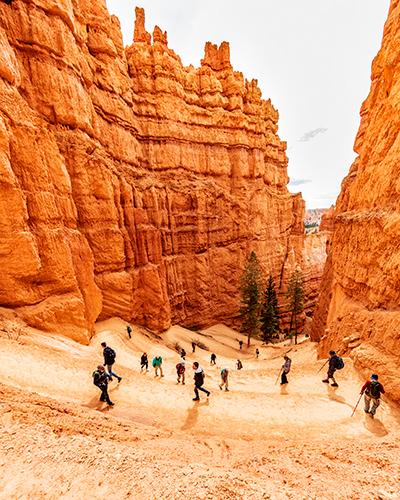
Up and down the Navajo Loop Trail switchbacks, Bryce Canyon National Park / Rebecca Latson
Sunset Point
You can get to Sunset Point via vehicle, Rim Trail (1.2 miles from Sunrise Point), the Queens Garden / Navajo Loop Trails, a short walk from the lodge, or the paved shared-use path. This spot is wonderful for sunsets, although you won’t be capturing images of the sun setting behind the mountains in front of you. Instead, this spot is fantastic for the firey late-afternoon and evening glow of the formations near the view area and the setting sun's gilding of distant mountaintops. Make use of your telephoto lens for close-ups of the saturated colors in the rock formations and amphitheater slopes. Get a few shots of people along the trail in some of your photos. I know, I talk about getting people in your images quite a bit, don't I? Most photographers think people get in the way of the landscape, but in this particular national park, you absolutely should have a couple of images with the tiny figures of people on the trail to give your viewer a sense of scale and reference.
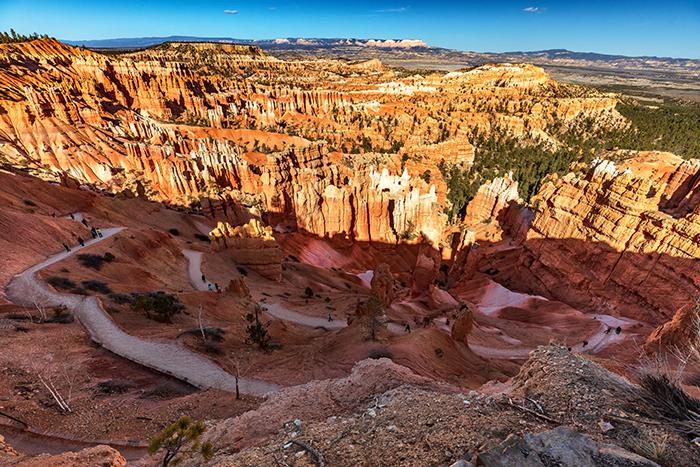
An afternoon view of the Navajo Loop Trail from Sunset Point, Bryce Canyon National Park / Rebecca Latson
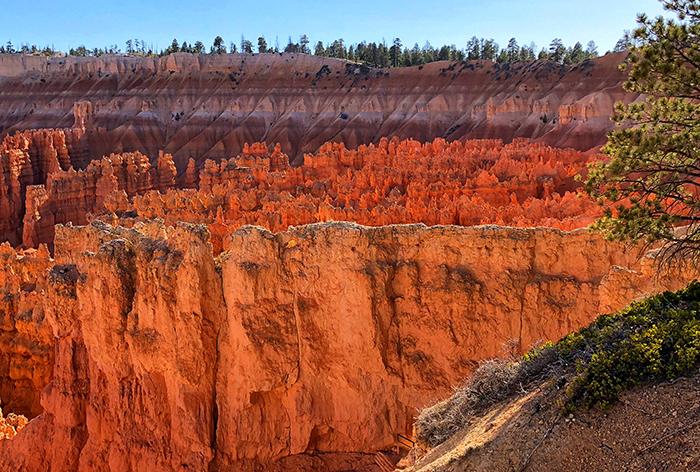
Late afternoon colors at Sunset Point, Bryce Canyon National Park / Rebecca Latson
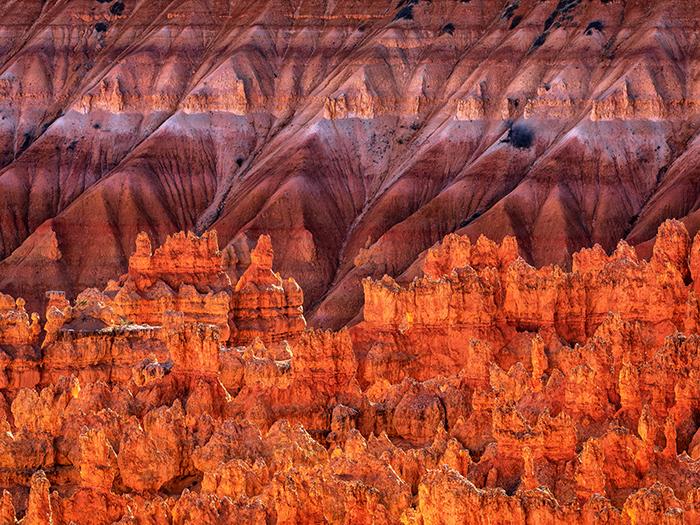
The colors of late afternoon at Sunset Point, Bryce Canyon National Park / Rebecca Latson
On a clear late afternoon, find that single source point of sunlight through the tree branches, set your lens aperture to f22 and try achieving a sunburst. You’ll need to adjust your other settings (shutter speed and ISO) to ensure nothing is underexposed, since f22 means your photo will be darker because the light hitting your lens is funneled through a very narrow opening in order to bend (diffract) off of the lens shutter blades to create those pointed light rays. I wrote an article in the Traveler about creating a sunburst, if you want to learn more.
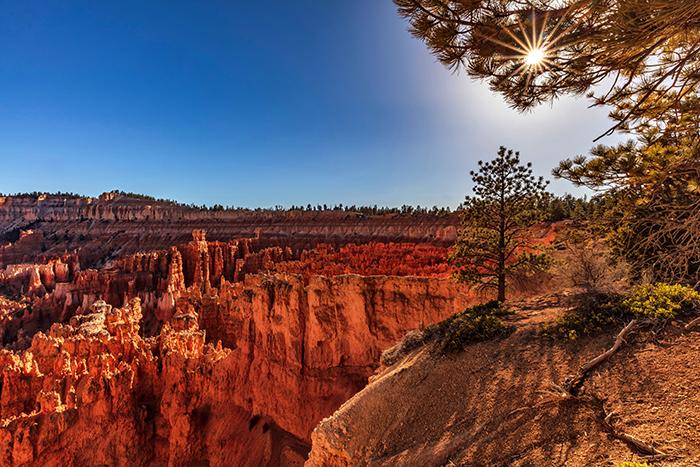
Late afternoon colors and a sunburst at Sunset Point, Bryce Canyon National Park / Rebecca Latson
As the sun descends behind you, the depths of Bryce Amphitheater begin to darken and the sky enters that “blue hour,” when the colors range from blue to indigo to violet. You’ll want to use a grad ND, if you have it, even as the scene gets darker because the sky above the horizon line remains brighter than the landscape below, and you will be setting your exposure for the darker landscape. Of course, you can always make exposure corrections using your photo editing application afterwards. Despite its name, blue hour doesn’t last for very long, so you’ll want to be all staked out for the event. Don’t be like the young man who raced to a spot beside me, hurriedly set up his tripod, then turned and asked me if he’d missed the last bit of light. Yes.
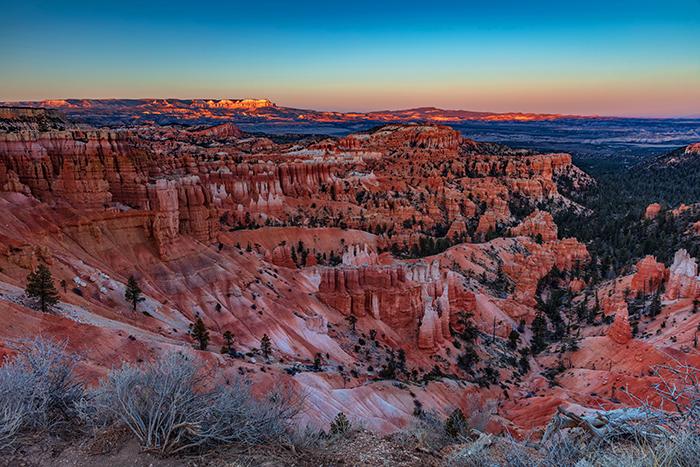
Sunset and the beginning of "blue hour" at Sunset Point, Bryce Canyon National Park / Rebecca Latson
Rim Trail
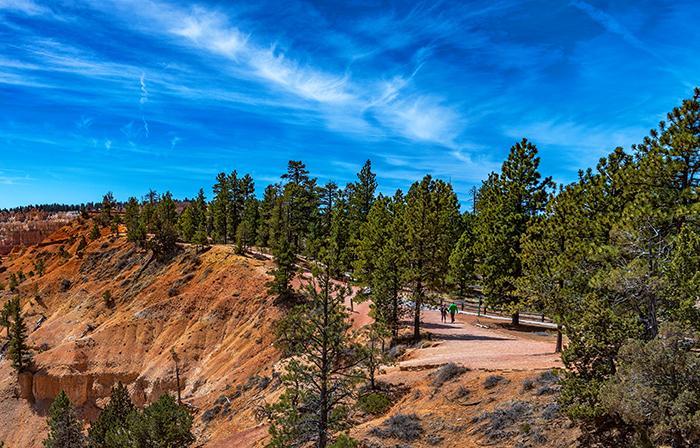
A scene along the rim trail near Sunrise Point, Bryce Canyon National Park / Rebecca Latson
Bryce Canyon’s Rim Trail is much like Grand Canyon's Rim Trail. It’s a well-maintained, easy-to-hike scenic 5.5 miles along the rim of Bryce Amphitheater (maybe a little steep in some places), dotted with thick log benches strategically placed for relaxing and enjoying the landscape. Any spot along this trail is perfect for morning, afternoon, and evening shots. It’s also a great place to try your hand at time-lapse videos. Just be aware that Rim Trail is exposed, so the winds can be gusty and quite cold. Use a sturdy tripod and remember to dress accordingly.
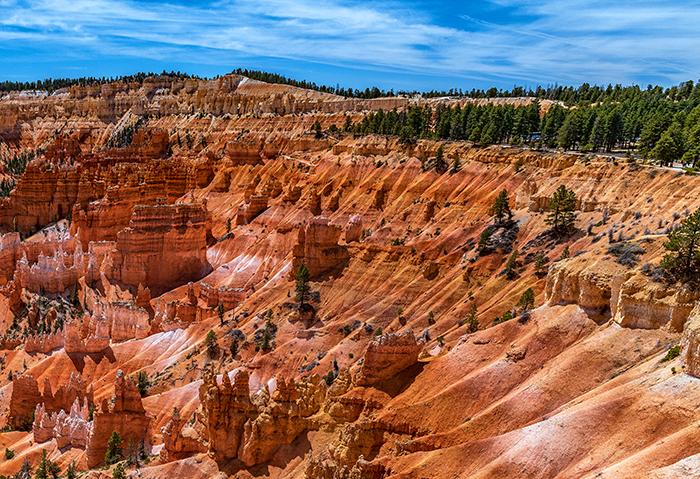
A view of Bryce Amphitheater and the rim trail, Bryce Canyon National Park / Rebecca Latson
Revisit these places during different times of day and under different weather conditions, because the same scene will look quite different. Travel to Bryce Canyon National Park during the spring and you might be treated to a snow day.
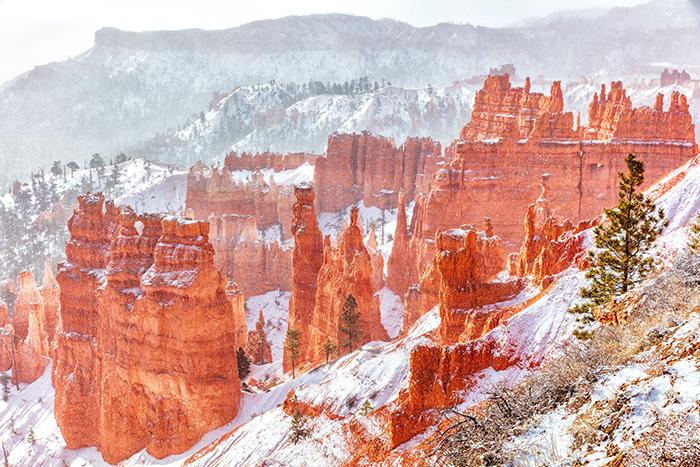
Snow day in the park, Bryce Canyon National Park / Rebecca Latson
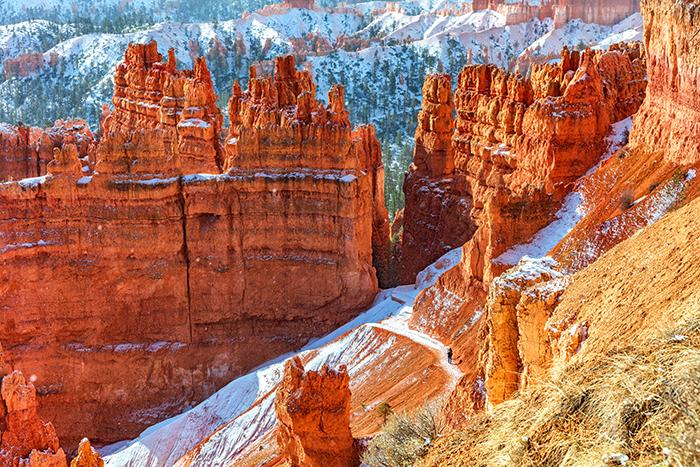
Snow and sun along the Navajo Loop trail, Bryce Canyon National Park / Rebecca Latson
I’ll stop this guide here and continue Part 2 next month, where I’ll cover the landscape from Inspiration Point all the way up to Rainbow Point.
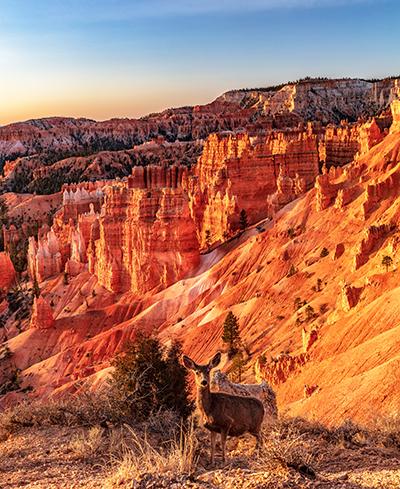
A sunrise visitor along the rim trail, Bryce Canyon National Park / Rebecca Latson


Comments
Beautiful photos and well written article, as usual. Thanks, Becky.
Amazing! Greay read! Very helpful! Heading there early early early tomorrow!
Spectacular photos!
Can they be bought as a postcard set??
Thanks for the wonderful photography tour, Rebecca. I'm leaving tomorrow from Cincinnati to check it all out. Your tips and descriptions will enhance my experience for sure.
Merci pour toutes ces precisions qui vont bientot me guider !
Claude
Magnificent photos, some freezing required plus a great deal of artistic talent. Makes me want to visit Bryce a third time!
Jim, Canberra
Awesome! Thanks a lot.
Great photos Becky. Heading to Bryce next week and you have given me some great insight for my trip.